
ワードプレスでお問い合わせフォームを作る時はプラグインから簡単に作れますが、プラグインを使わずGoogleフォームからお問い合わせフォーム作る方法があります。
 たちママ
たちママびっくりするほど簡単に作れるのでサクッと覚えて使ってみましょう♪
作成方法を初心者向けに画像多めで説明するのでぜひ作ってみましょう!
Googleフォームで作成!お問い合わせフォームの作り方
Googleフォームでのお問い合わせフォームの作り方は本当に簡単です。
数分で作成可能。
 たちママ
たちママでは、早速作っていきましょう~♪
Googleフォームを開く
最初にGoogleフォームを開きます。
下記にリンクを張り付けたので下記をクリックしてください。

Googleフォームを開いたら、下記のような画像が表示されます。

①左側のパーソナルの「Googleフォームを使ってみる」をクリック。
Googleアカウントにログインしていない人はログイン画面が表示されるのでログインしてください。

②上の方に「新しいフォームを作成」欄があるので、左の「空白」をクリック。
これでGoogleフォームの作成画面にいきました。
たちママここからGoogleフォームでお問い合わせフォーム作成をしていきますよ~♪
Googleフォームのお問い合わせ内容を入力して作成する
Googleフォームは好きなように項目を増やして内容を追加することができるので自由度はかなり高めです。
 たちママ
たちママ用途にあわせて項目が作れるのは魅力的ですね☺
今回は一般的なお問い合わせフォームにある下記の内容で作成していきましょう!
- 名前
- メールアドレス
- 件名
- お問い合わせ内容
Googleフォームのお問い合わせタイトル部分を入力する
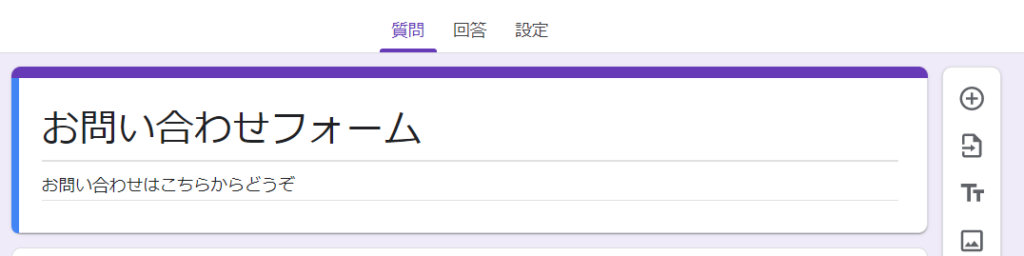
画面を開くと下記の画像のような画面になっているので、①の無題のフォーム部分と②のフォームの説明を入力していきます。

- 無題のフォームの部分に「お問い合わせ」を入力
- フォームの説明の部分に「お問い合わせはこちらからどうぞ」などの文言を入力
 たちママ
たちママこれでタイトル部分は完了♪
次に名前欄を作成しましょう☺
Googleフォームのお問い合わせ名前欄を作成する
名前欄を作成していきます。
①の無題の質問の部分、②のラジオボタンと表示されている部分、③の必須ボタンを入力します。

- 無題の質問と表示されている部分に「お名前」と入力
- ラジオボタンの部分の右のプルダウンメニュー▼をクリックし「記述式」を選択
- 必須ボタンをクリックし選択する

 たちママ
たちママ上の画像のようになっていればOK♪
これで名前欄ができました。
「必須」を選択した項目は*マークがついて入力漏れがあると送信できません。全ての項目を入力して欲しいので全部「必須」にチェックしましょう。
次の項目を追加する方法
お問い合わせフォームの項目を追加したい場合は右側にある下図のプラスボタンをクリックします。
次はメールアドレス欄を作成します!
毎回、新しい欄を作る時は、上の画像の+ボタンをクリックして項目を追加してください。
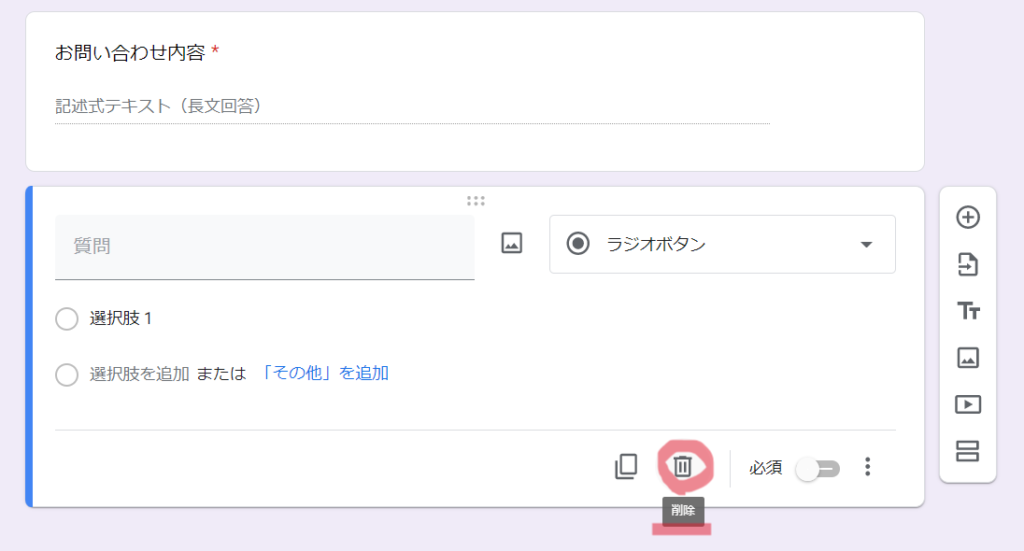
間違えて項目を増やしすぎたらどうする?項目削除方法
+ボタンをクリックで項目追加できますが、項目を削除したい場合は下図の「削除」ボタンをクリック。
その項目だけを削除することができますよ~。
Googleフォームのお問い合わせメールアドレス欄を作成する
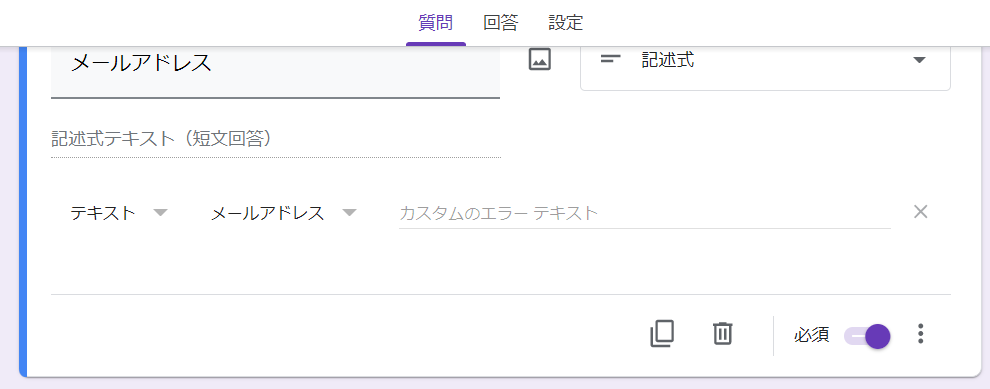
①の無題の質問の部分、②のラジオボタンと表示されている部分を選択、③の必須ボタンを入力し、④の三点ボタンをクリックします。

④の…をクリックして下図の「回答の検証」を選択。
すると下図のような「数値」「次より大きい」というプルダウンメニューが表示されるので「テキスト」「メールアドレス」を選択します。

- 無題の質問と表示されている部分に「メールアドレス」と入力
- ラジオボタンの部分の右のプルダウンメニュー▼をクリックし「記述式」を選択
- 必須ボタンをクリックし選択する
- 必須ボタンの横の…をクリックして「回答の検証」をクリック
- プルダウンメニューの▼をクリックして「テキスト」を選択
- プルダウンメニューの▼をクリックして「メールアドレス」を選択
「回答の検証」でメールアドレスが入力されているか自動的に確認してくれます。
以下の画像のようになっていたらメールアドレス欄の完成です。
次は件名欄を作成しましょう!
Googleフォームのお問い合わせ件名欄を作成する
+ボタンをクリックして項目を追加します。
①の無題の質問の部分、②のラジオボタンと表示されている部分、③の必須ボタンを入力します。

- 無題の質問と表示されている部分に「件名」と入力
- ラジオボタンの部分の右のプルダウンメニュー▼をクリックし「記述式」を選択
- 必須ボタンをクリックし選択する
 たちママ
たちママ最後に、お問い合わせ内容欄を作成しましょう♪
Googleフォームでお問い合わせ内容欄を作成する
+ボタンをクリックして項目を追加します。
①の無題の質問の部分、②のラジオボタンと表示されている部分、③の必須ボタンを入力します。

- 無題の質問と表示されている部分に「お問い合わせ内容」と入力
- ラジオボタンの部分の右のプルダウンメニュー▼をクリックし「段落」を選択
- 必須ボタンをクリックし選択する
たちママ段落を選択すると長文が入力できるようになるのでこの欄は段落になります。
これでお問い合わせフォームの入力は終わり。
次に、お問い合わせがあった時の表示内容を設定していきます!
Googleフォームのお問い合わせフォーム詳細を設定する
お問い合わせフォームの型が完成したら、お知らせがくるように2つの設定をします。

お問い合わせフォームの項目欄の入力が終わったら、上にある「回答」をクリックします。
右の三点ボタンをクリックして「新しい回答についてのメール通知を受け取る」を選択します。
- 上の「回答」をクリック
- 三点ボタンをクリックして「新しい回答についてのメール通知を受け取る」を選択
たちママこれでお問い合わせフォームからお問い合わせがあった時に自分のメールに通知がくるようになりました。
次に、お問い合わせがあった時の表示設定をします。

- 上の「設定」欄をクリック
- プレゼンテーションの右にあるプルダウンメニューの∨をクリック
- 確認メッセージの「編集」ボタンをクリック
- 「お問い合わせありがとうございます」等の表示させたいメッセージを入力し保存をクリック
- 「別の回答を表示するためのリンクを表示」をオフにする
 たちママ
たちママ上記の設定でお問い合わせフォームからお問い合わせを送った時に、送信したことの表示ができるようになりました。
設定は以上で終わりです♪
最後に、このお問い合わせフォームをサイトに追加する方法をご紹介します。
Googleフォームのお問い合わせフォームを設置する方法
お問い合わせフォームを追加したいサイトに、あらかじめ以下の内容を追加しておくことをおすすめします。
- タイトルに「お問い合わせフォーム」と入力する
- パーマリンクなどを設定しておく(設定しない人はそのままでOK)
- 日付はブログ開設日の数日後に設定
(ただし、固定ページが設定ができない場合は新着記事として固定ページに表示させる)
では、Googleフォームで作ったお問い合わせフォームの埋め込みリンクを作成します!
下図の手順でコピーをしましょう。

- Googleフォームの右上にある「送信」ボタンをクリック
- <>をクリック
すると下図のように埋め込みができるリンクがコピーできます♪
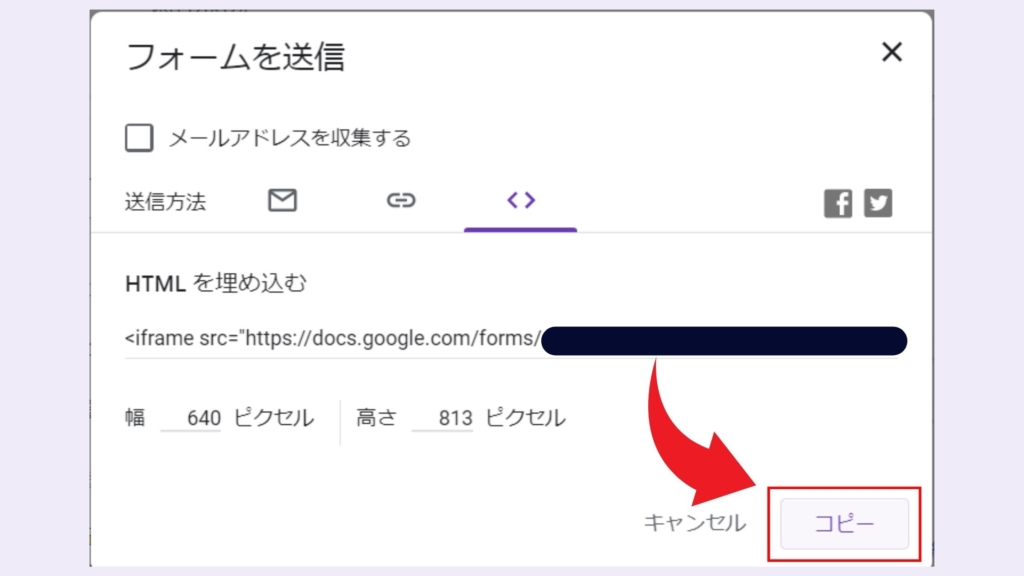
- 下のコピーボタンを押してコピーをする
- コピーしたリンクを、お問い合わせフォームを設置したいブログのHTML編集画面に貼る
以上でGoogleフォームを使用したお問い合わせフォームの設置ができます!
たちママ色々な項目が追加できるので使い方がたくさんありそうですね☺
ぜひ使ってみて下さいね~。